Car detailing is not simply washing your car, it is a thorough process that requires a number of steps to clean up the look of your car, preserve its surfaces, and retain its value. Regardless of whether you are a novice or want to take your auto care to the next level, the right car detailing process will enable you to get a professional-grade finish in the comfort of your own home. This guide will take you through the key steps of car detailing, including cleaning, protecting, and preserving your car, so you can have a showroom-quality shine that lasts.
Essential Steps For Car Detailing from Pros
Car detailing is an art in itself because it requires a delicate balance of deep cleaning, restoration, and protection to achieve the best shine possible in your car, both interior and exterior. Nevertheless, there are a few key professional car detailing procedures that will save you time and energy and still provide you with a breathtaking result. These are the tips that have been tested and tried, and they will make you work smarter, not harder, and make sure that you preserve and improve the surfaces of your car without overworking yourself. Being a beginner or an experienced detailer, this detailed guide on car detailing steps will help you to get those showroom-like results with no effort. So, how do you go about detailing your car? Let us take a look at the entire process step by step!
Step 1: Start with a Thorough Inspection
Before getting started, check your car for problem areas that may need special attention – scratches or stains, and damaged trim. This helps to customize your detailing process for optimal results.
Step 2: Pre-Wash to Loosen Dirt
Use a pressure washer or hose to wash down any dirt and debris that fell off. Foam cannon or pre-wash spray — Breaking down stubborn contaminants that make washing more risky for scratching, without this, the wash mitt can scratch the surface by grabbing some dirt.
Step 3: Use the Two-Bucket Wash Method
One bucket should be filled with soapy water and the other with clean water to rinse your wash mitt. This stops dirt from reapplying onto the surface of your car, which decreases the presence of swirl marks and scratches.
Step 4: Clean Wheels and Tires First
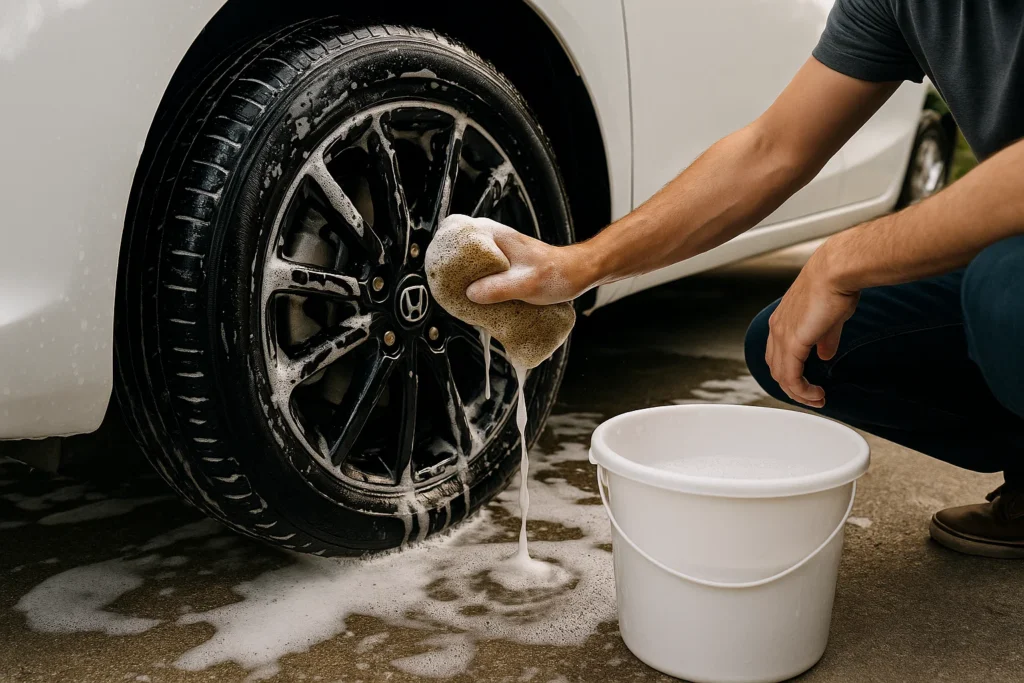
Brake dirt collects on wheels and tires. Since the duster accumulates dirt, clean the portions using rags before washing the other parts of the car, or else you will be splattering dirt onto a clean surface. Ideal Scenario: Use a proper wheel cleaner and stiff brush!
Step 5: Use pH-Neutral Car Shampoo
Opt for a gentle, pH-neutral shampoo that will safeguard the paint and wax layers of your automobile while removing dirt. Strong detergents can remove these fiber coats and ruin the polish.
Step 6: Clay Bar Treatment to Remove Surface Contaminants
A clay bar will remove embedded contaminants that routine washing cannot, such as tree sap, tar, and industrial fallout. It serves to smooth the surface before polishing or waxing.
Step 7: Polish for Swirl Mark & Scratch Removal
Remove light scratches and swirl marks with a quality polish using a dual-action polisher or by hand. Polishing adds back the clarity and gloss to the paint.
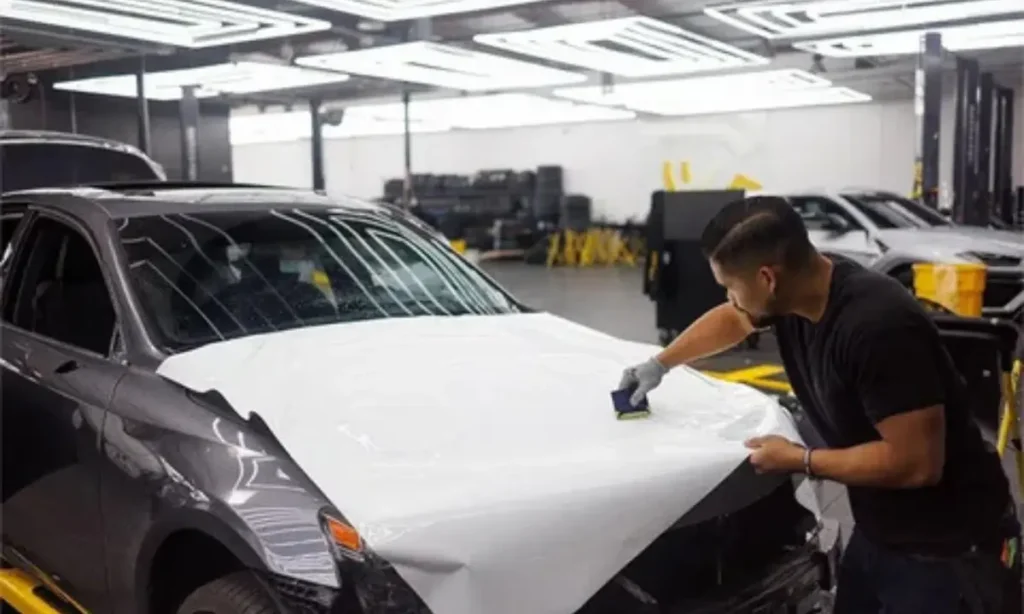
Step 8: Apply Protective Coatings
Protect your paint with wax, sealant, or ceramic coating to protect from UV rays, dirt, and water spots. Such coatings increase shine and facilitate easier cleaning in the future.
Step 9: Detail the Interior Thoroughly
Vacuum carpets, seats, and crevices. Utilize leather, vinyl or fabric surface-appropriate cleaners and conditioners. Improve visibility with clean windows (internal and external).
Step 10: Clean and Protect Dashboard and Vents
Use microfiber cloths to wipe down the dashboard and vents using mild cleaners. Then, use a UV protectant to prevent them from fading and cracking. Dust between vents with compressed air or brushes.
Step 11: Use Quick Detailing Sprays for Touch-Ups
Use quick detailing sprays to perform touch-ups. Always have a quick detailer spray ready to eliminate fingerprints, dust, and light smudges between washes. This prevents a full wash but allows for a neat appearance.
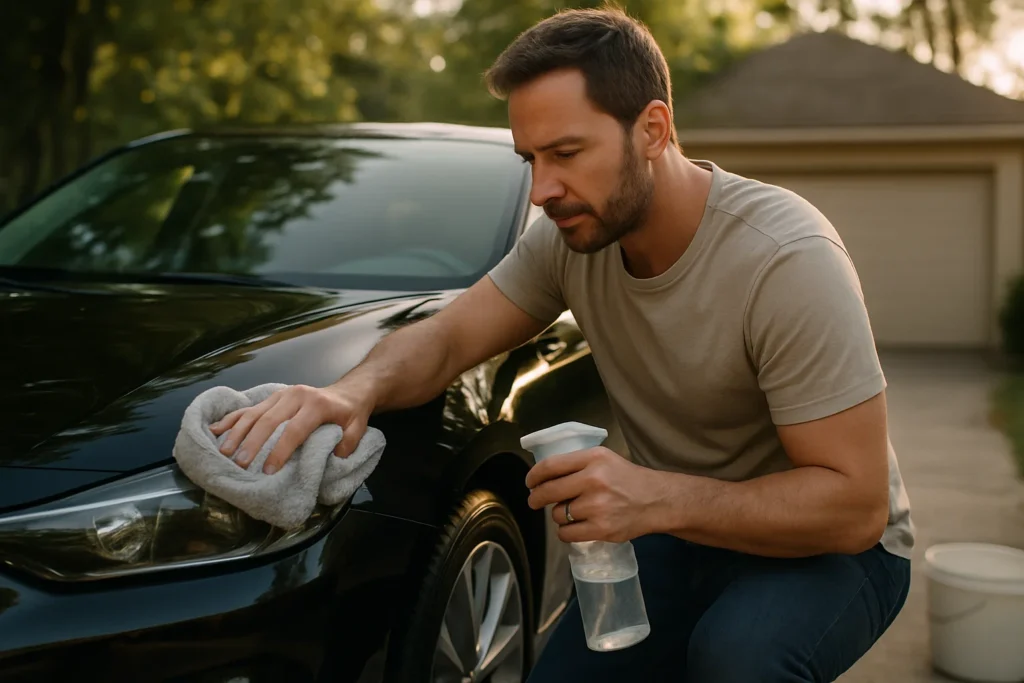
Step 12: Dry with High-Quality Microfiber Towels
After washing, dry the car with soft, lint-free, microfiber towels. Do not air dry since it may create water streaks. Pat dry (instead of wiping) to minimize swirl marks.
How Often Should You Detail Your Car?
The frequency with which you should detail your car is determined by many factors, such as the environment in which you live, your driving habits, and the level of care. Most drivers prefer to get detailing done every 3 to 6 months because it is the best way of keeping the car looking good and protecting the surface as well.
| Usage Condition | Detailing Frequency | Notes |
| Average Use | Every 3 to 6 months | Maintains appearance |
| Heavy Use/Harsh Climate | Every 2 to 3 months | Protects against damage |
| Garage-Kept/Occasional | Once or twice a year | Minimal exposure |
| Pets/Children Interior | More frequent | Manage stains and odors |
| Between Details | Use quick sprays regularly | Keeps the car looking clean |
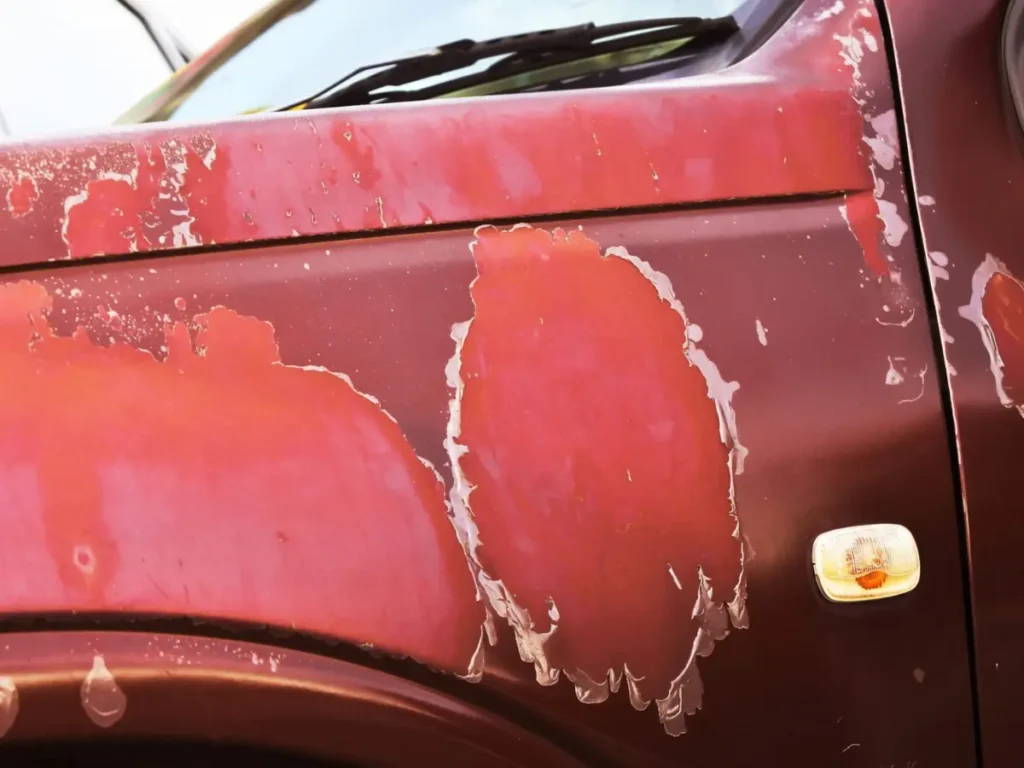
Common Car Detailing Mistakes to Avoid
Car detailing requires time and precision to bring out a perfect finish. Even well-intentioned efforts can sometimes cause more harm than good. These are some of the most common mistakes to avoid to secure the surfaces of your vehicle and achieve high-professional results:
Washing in Direct Sunlight
Do not wash or detail your car in direct sunlight
Washing With Dirty or Rough Towels
Always apply clean, soft microfiber towels that are specifically designed to care for the car.
Using too much Polish, Wax, or Dressing
The more the product, the better the results. Use thin, even layers and follow product directions.
Neglecting Interior Cleaning
Not cleaning dirt resulted in a contaminated cabin atmosphere and reduced the overall interior comforts.
Missing Routine Maintenance
Detailing must be a habitual thing. Routine maintenance will help avoid long-term wear and tear and make your car look good.
Unsuitable Washing Methods
Failure to follow the two-bucket technique or not washing wash mitts thoroughly may add dirt back to
your car’s surface, creating scratches and swirls.
By avoiding these pitfalls, you not only save your investment but also your time and effort in the long run, and have a deeper, long-lasting shine.
Car Cleaning Tips and Tricks from Experts
Even if you mean well, certain blunders can ruin your detailing job and even damage your car. Avoid these common traps:
- Washing in the Direct Sunlight: Never wash your car in the direct sunlight, since the soaps and cleaners dry off and leave behind unwanted spots and stripes.
- Using dirtier or rough towels: Using dirty or rough towels can cause swirl marks or scratches on your paint. Never use anything else than clean, soft microfiber towels.
- Applying too much polish, wax, or interior dressing is a common mistake that leaves behind product residue that will attract more dust, as well as dulling the finish instead of improving it.
- Not Cleaning Interior: Dust, grime, and allergens build up in interior vents, seams, and dashboard crevices, where they become trapped and recirculated through the air with your next breath (the air in cars sometimes has more contamination than the air outside).
Neglecting Routine Maintenance: If the car isn’t cleaned regularly, the grime will harden and become more damaging as time progresses, potentially making cleaning a fight for professionals, experts warn.
Conclusion:
Learning car detailing hacks from professionals allows you to maintain condition of your car, removing dirt and grime at no added cost to your pocket. With expert advice on everything from washing to surface prep, interior cleaning, polishing, waxing and sealing, a showroom-quality shine is easy and long lasting. Detailing regularly not just makes your car look amazing but it also increases the resale value and your driving experience. Whether you’re the DIY type and just want to know how the pros do it, these hacks will offer a founded approach to car care.
FAQ’s
For best results, you should detail your car every 3-6 months. The car’s cleanliness can be maintained using more regular upkeep washes, and simple, quick detail sprays.
Car wash is surface cleaning, but detailing is the deep clean, and it also includes polishing, waxing and interior care.
The answer is yes, as long as you have the right tools, products and a good amount of patience, you can detail your car at home and get professional results.
Professional grade pH-neutral shampoos, clay bars, polishing compounds, waxes, sealants, ceramic coatings, and specific interior cleaners all play part in the detailing process.
TWO BUCKETS + Microfiber Wash Mitts + light pressure and RINSE well = REDUCED swirls and scratches.